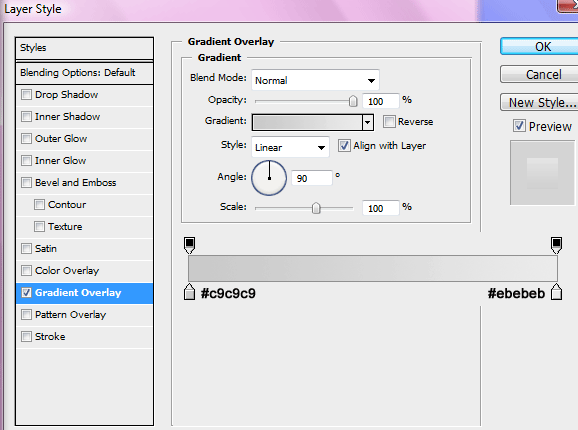
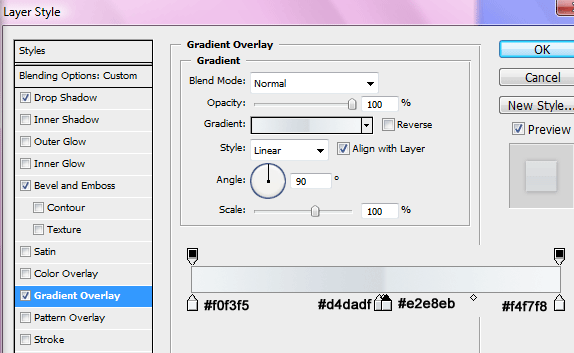
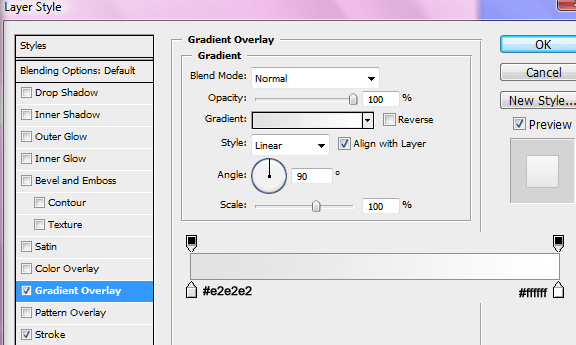
Right lets get started, create a new document 800x750 pixels double click your background layer then press ok when the box pops up. Your background layer should now be unlocked and editable. Add this gradient overlay to your background layer.
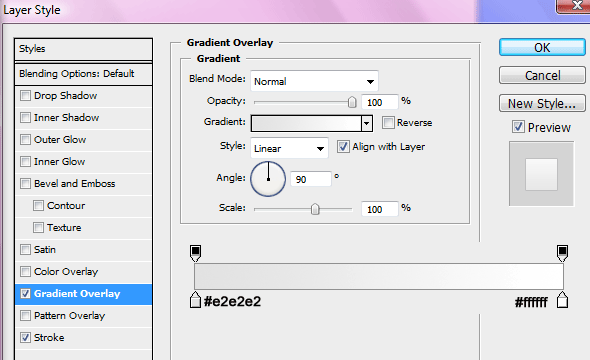
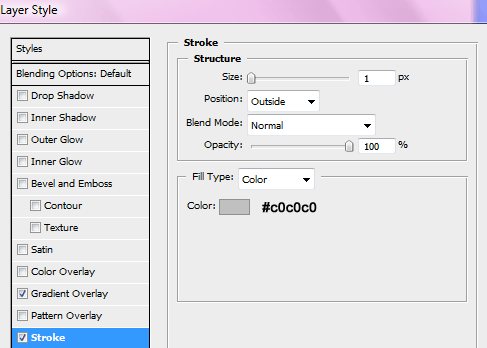
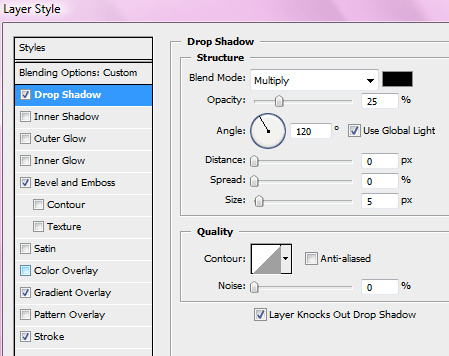
At the top of your canvas create a rectangle about 33 pixels in height and the same width as the canvas, you can create the rectangle using the rectangular marquee tool or the rectangle tool. Fill your rectangle with any color then add these layer styles.
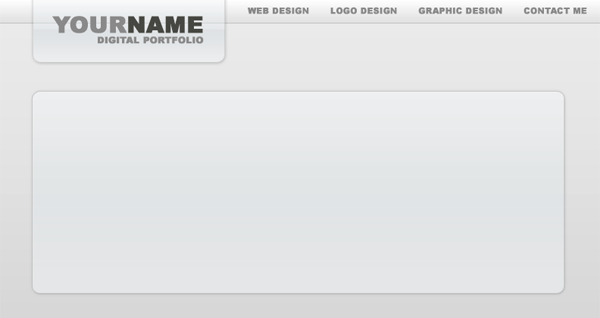
You should have something like this.

Select the rounded rectangle tool with a radius of 10px, Draw out a fairly decent size rectangle, move the rectangle to the top of your canvas on the left.

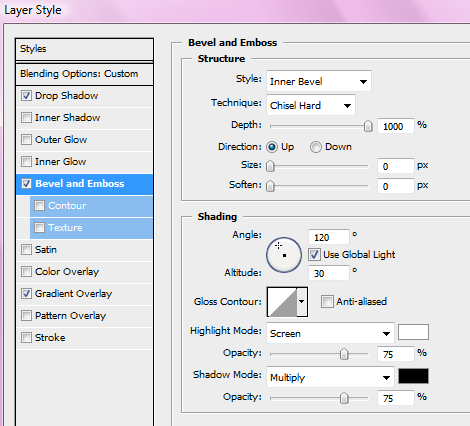
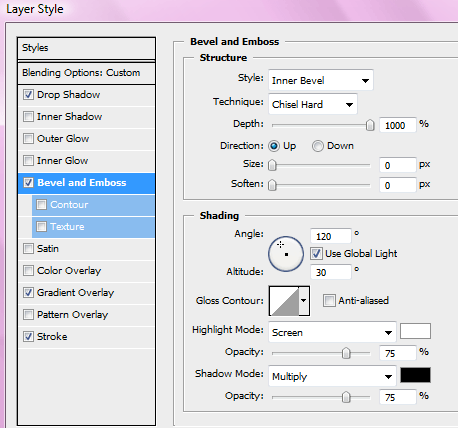
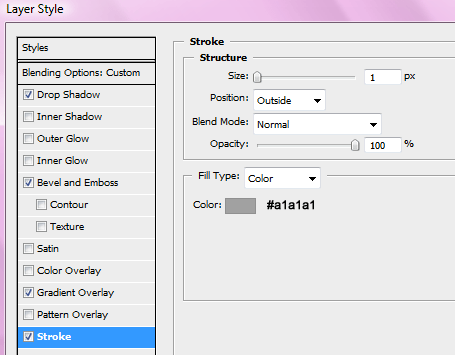
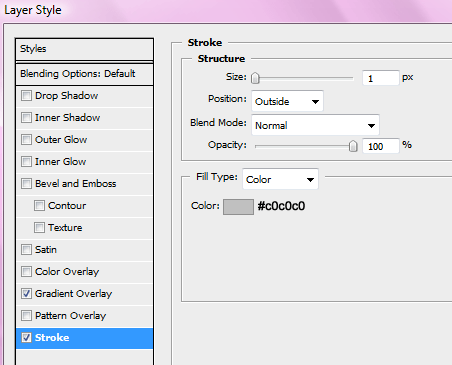
Right click the rectangle and goto "fill path" color doesnt matter at this time. Then select the pen tool, right click your rectangle and goto "delete path". Add these layer styles to your rectangle.

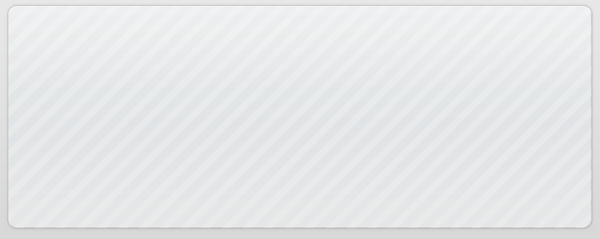
Set layer blending mode to 50%, you should have something like this.

Inside the box add your name and the word digital portfolio, the font i used is arial with a style of black (after bold). On the right hand side in the little bar add your portfolio sections.

With the rounded rectangle tool once more create a bigish rectangle underneath everything eles.
Add these layer styles to get it looking like mine.

For this next bit we need to make a diagonal lines pattern, create a new document 25x25 pixels copy the pattern below.
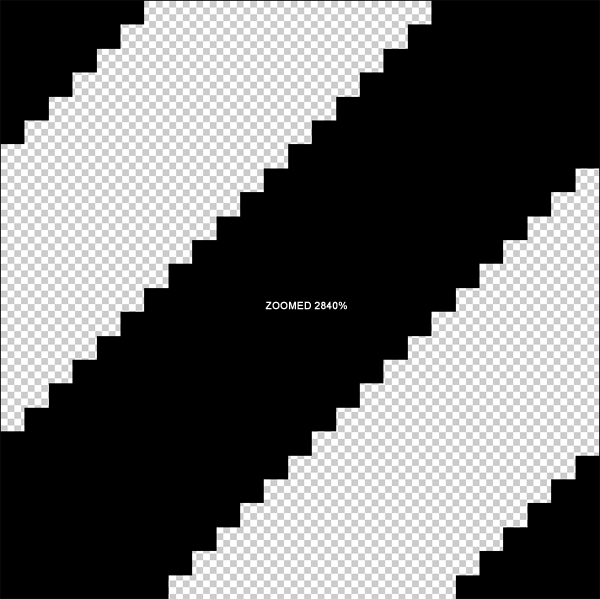
Once you've copied the pattern got to "edit > define pattern" Close your document and head back over to your original document, create a new layer above your content box layer. Click the little thumbnail image in your content box layer whilst holding down the Ctrl key on the keyboard this should load a selection. Select your new layer and the paint bucket tool at the top of your document change foreground to pattern, select your pattern from the drop down box and fill your selection. Set layer opacity to 21% and give the pattern a white color overlay from within the layer styles window. You should have something like this.
With the rounded rectangle again create another rectangle inside your big rectangle.

Add these layer styles to your inner rectangle to match mine.
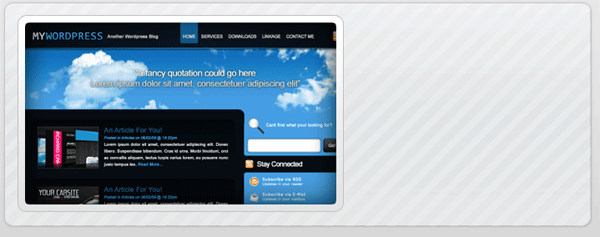
Click the thumbnail in your layers palette on the inner rectangle layer whilst holding the Ctrl key, this will load the selection. Goto "select > modify > contract". Contract the selection by 8 pixels. Copy your desired thumbnail preview to the clipboard, now goto "edit > paste into", your desired image will now be pasted within the boundaries of your selection.
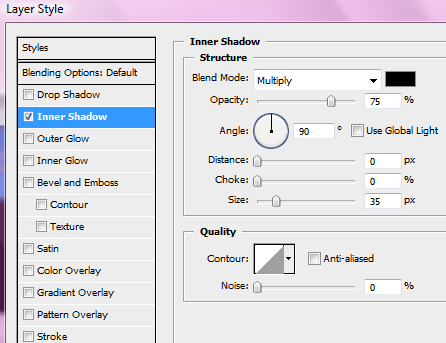
Add a simple inner glow to your thumbnail image user the settings below.
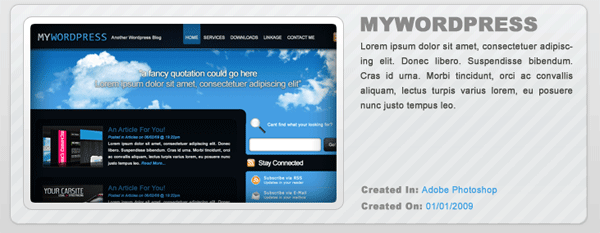
On the right side of your image add your descriptive text, title, created date and the program your created it in.
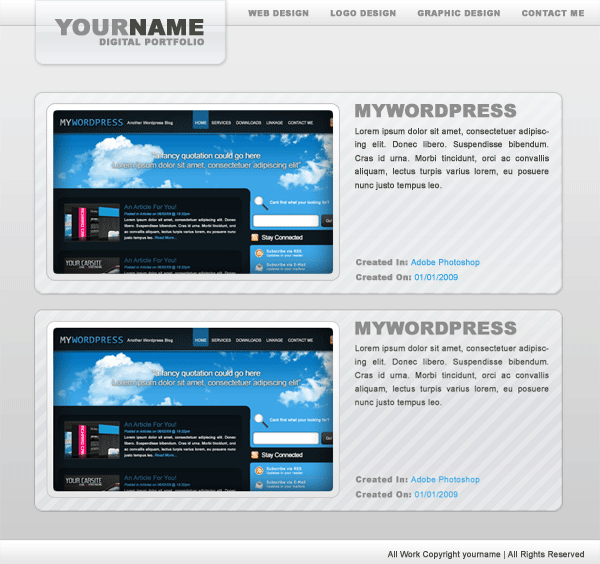
Duplicate all the content layers as required, although you only really need one as it can be duplicated using CSS when coded. Duplicate your top bar and drag to the bottom of the canvas, add your copyright information with the bar. Your end result should look something like this.
In the next tutorial il show you how to code this into a working CSS website.
No comments:
Post a Comment