In this tutorial you will learn how to create a dark header with a sleek and stylish navigation. If you have any questions about this tutorial be sure to ask in the comments. Also, remember with all the tutorials, the psd is available for download.
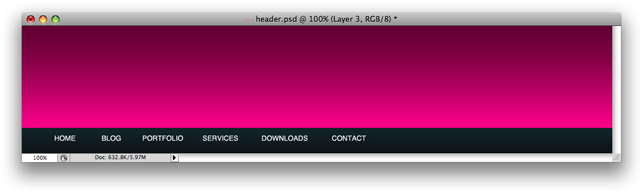
Your final result will look like this

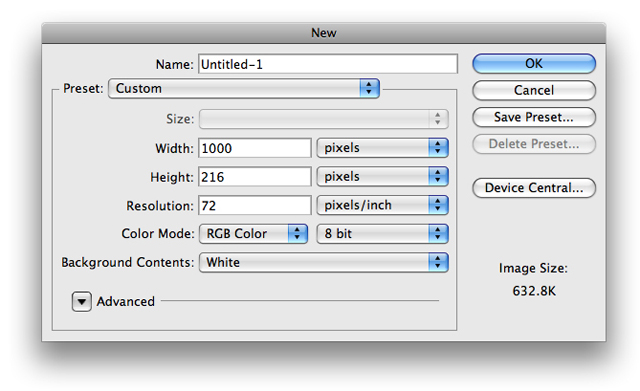
1. First things first. We want to create a new document with the size 1024×205.

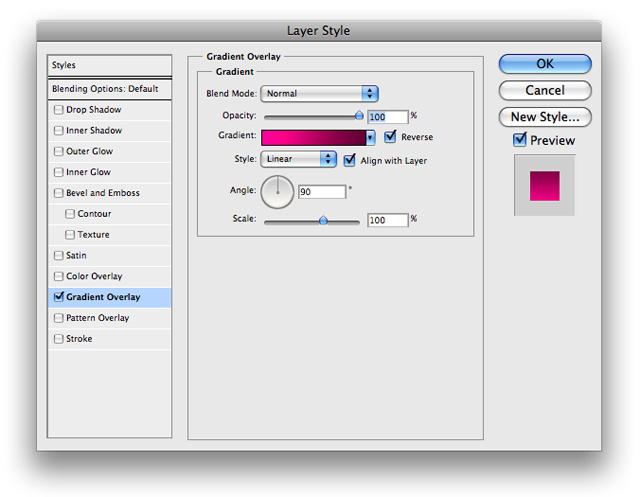
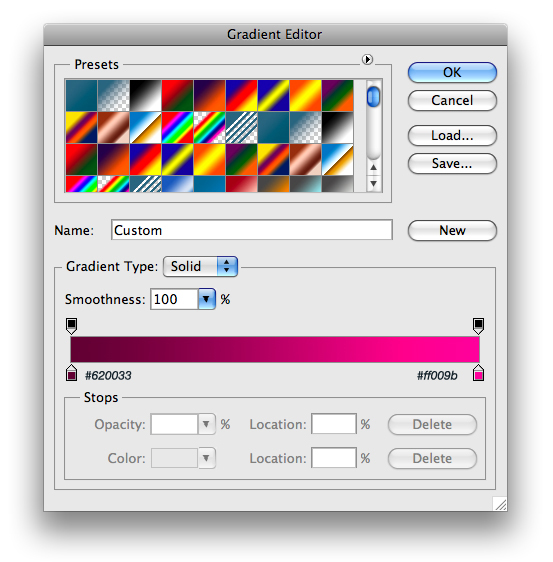
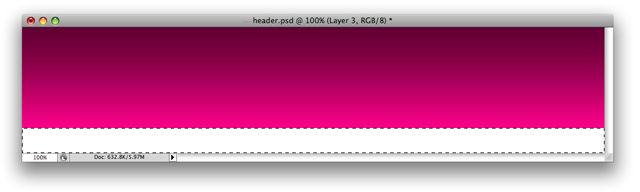
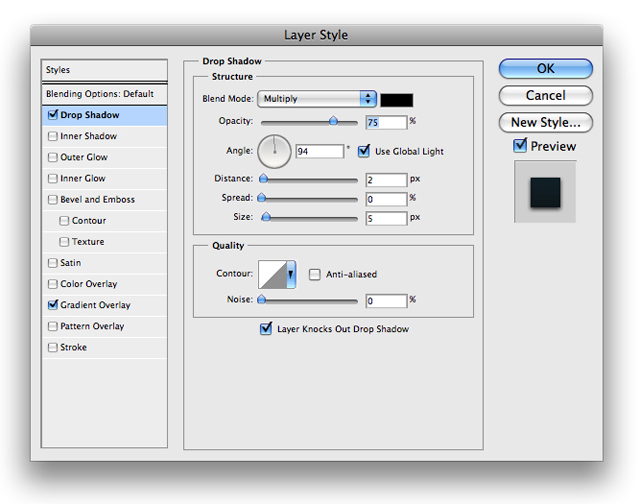
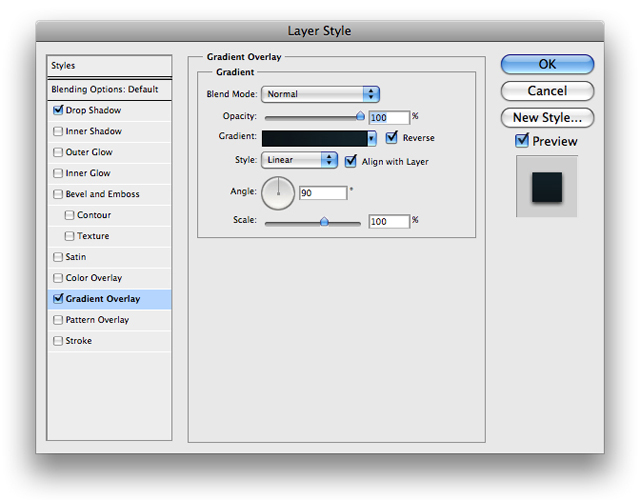
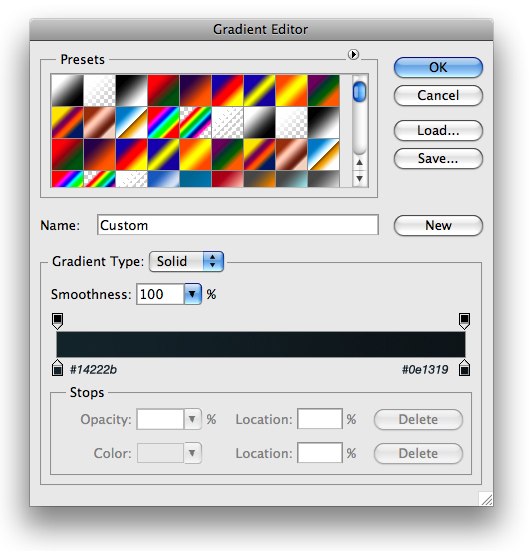
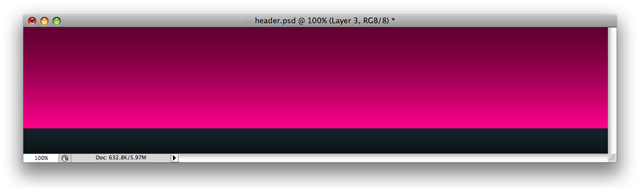
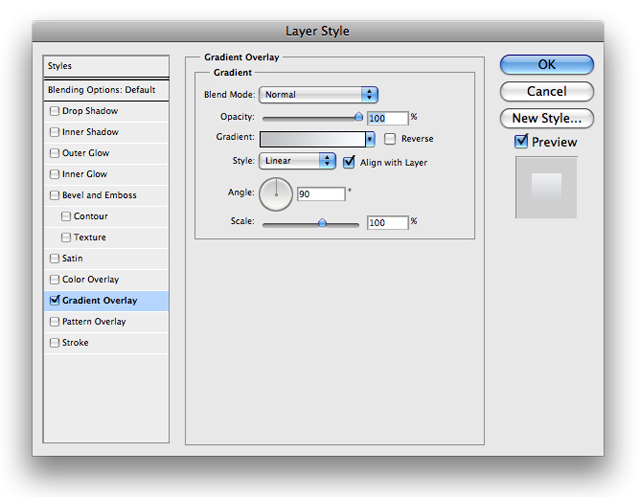
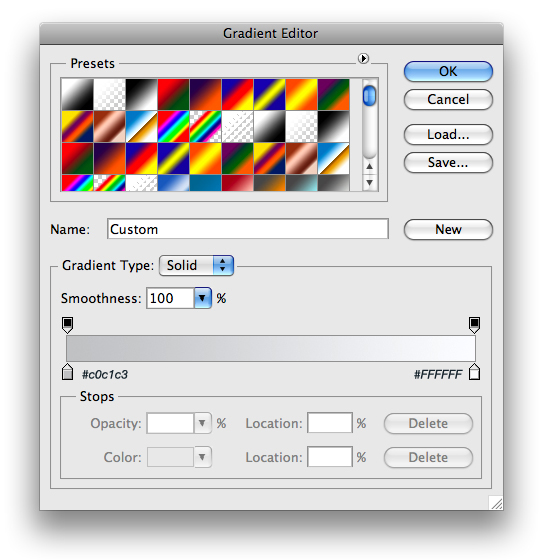
2. The next thing we would like to do is to add a gradient to our background layer. To do so, lets go ahead and right click your background layer, and choose Blending options from the drop down menu and insert the following


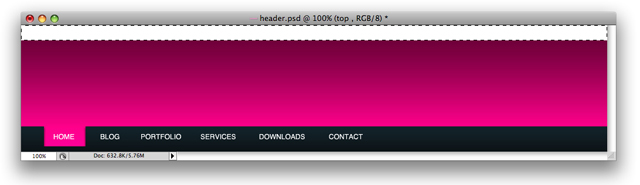
3. Next, we want to use our rectangle marquee tool to make a selection similar to the following and fill it with #FFFFFF

4. On that layer input the following blending options

5. Next I added a little ’shine’ to that blue bar. To do so I CTRL+CLICK (command on a Mac) the blue bars layer to make a selection of it. On a new layer above it I filled it with #FFFFFF and deleted the bottom half and changed the blend mode to soft light. You should now have something that looks similar to the following

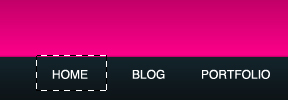
6. After this we want to go ahead and start making our navigational buttons for the menu. To do so, pull out your rectangle marquee tool and make a selection similar to the following and fill it with a solid color:

7. Then you want to go ahead and insert the following blending options onto its layer


8. Your button should look something like this

9. Next we want to add a shine to the button and to do so we want to CTRL+CLICK (command+click on mac) your buttons layer to select it. and fill it with #FFFFFF
10. Using your arrow keys ‘nudge’ your selection tool to the bottom half and choose edit>clear, and you’ll have something that looks like this

11. Now just lower the opacity to 28% and then change blending option to overlay and you should have the following results

12. Looks good huh? Well go ahead and add some text (I used all caps, but it doesn’t matter what you do) and this is what I came up with

13. Next just repeat steps 6-12 as many times as your little heart desires and you will have something that looks like the folllowing

14. The next step we want to do is to add a small logo. I used a simple text with all caps, Helvetica Neue, and inserted it in the following position:

15. I wanted it to be more than just plain white, so i went ahead and inserted the following blending options onto its layer


16. By this point you should have something that looks like this

17. All we have left to do now is add a search box, and we will be done 
18. Now go ahead and pull out your rectangle marquee tool yet again and make a selection like this and fill it with #FFFFFF on its own layer

19. Then we want to go ahead and insert the following blending options onto its layer


20. You should be left with something that looks like this

21. Go head and create a new selection similar to the following on its own layer and fill it with #FFFFF. This will serve as our input box.

22. I added a little stroke to the blending options, but its optional.
23. Next lets go ahead and make our search button (would make it a little hard to search without it).
24. To do so use your rectangle marquee tool to make a selection similar to the following

25. Go ahead and insert the following blending options onto its layer


26. Now just add a little text and a shine and you’ll have something that looks like this

27. The last thing we want to do is to add a little ‘glow’ to give our header some slight perspective. To do so pull out your elliptical marquee tool. set the feather to about 20px and make a selection similar to the following:

28. Fill it with white and place it on a layer behind everything else. Use your rectangle marquee to select everything that is above the blue bar and choose Edit>Clear. Then just lower the opacity to 69% and change the blending options to Overlay and your final product will look like this